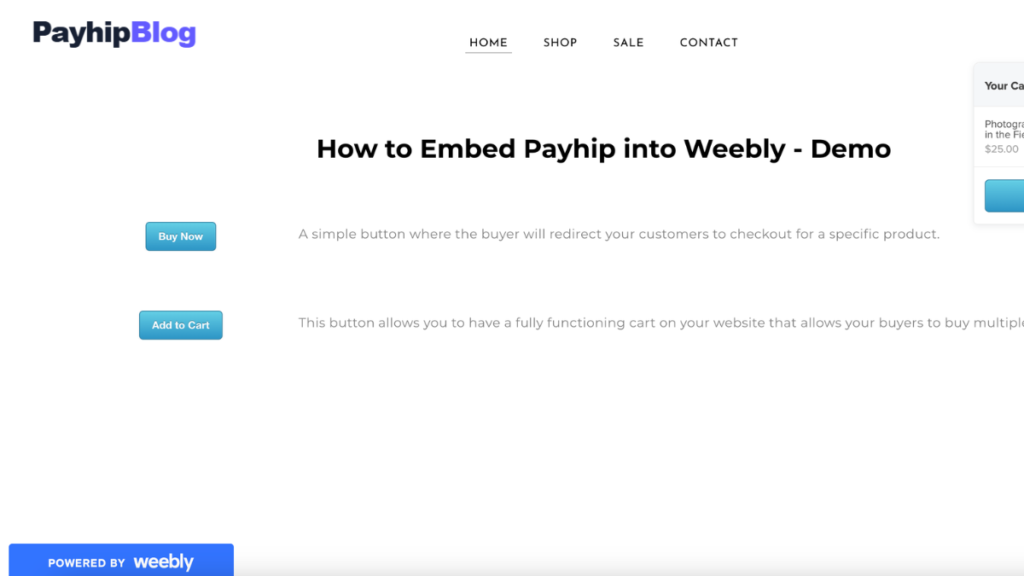
how to add Payhip to a website If you already have a website and want to sell ebooks, templates, courses, printables, software, or other digital products, you do not always need to build a complete ecommerce system from scratch. One option is to connect your website with Payhip and use it to handle your product pages, checkout, and digital delivery how to add Payhip to a website.
I found this approach useful when working with a small website because it keeps the website focused on content and branding while the store handles the selling process. Instead of creating a custom shopping cart, payment system, order database, and download system, you can connect visitors from your website to your Payhip products how to add Payhip to a website.
The exact setup depends on what you mean by “add Payhip to a website.” You can simply add product links and buttons, create a dedicated shop page, or use Payhip’s available embedding options where appropriate how to add Payhip to a website.
This guide explains the practical ways to do it and the mistakes worth avoiding.
What Does It Mean to Add Payhip to a Website?
Adding Payhip to a website usually means connecting your existing website to your Payhip store or products.
For example, imagine you have a personal website called MyDesignHub.com. You sell three products:
- A Canva template bundle
- A PDF guide
- A collection of social media templates
Instead of building separate ecommerce functionality on your website, you could create the products in Payhip and place buttons such as “Buy Now” or “Get the Template” on your website how to add Payhip to a website.
When a visitor clicks the button, they can be taken to the relevant Payhip product or checkout page.
Your website might look something like this:
Your Website → Product Section → Payhip Product → Checkout → Digital Delivery
This can be much easier than developing your own payment and download system.
What You Need Before Adding Payhip
Before starting, make sure you have a few things ready.
First, you need a Payhip account and at least one product. If you have not created a product yet, prepare the product file, title, description, price, and product image how to add Payhip to a website.
You also need access to your website.
The instructions are slightly different depending on your platform. You might be using:
- WordPress
- Wix
- Squarespace
- Shopify
- A custom HTML website
- A website built with Bootstrap
- A website created with Laravel or another framework
Step 1: Create Your Product in Payhip
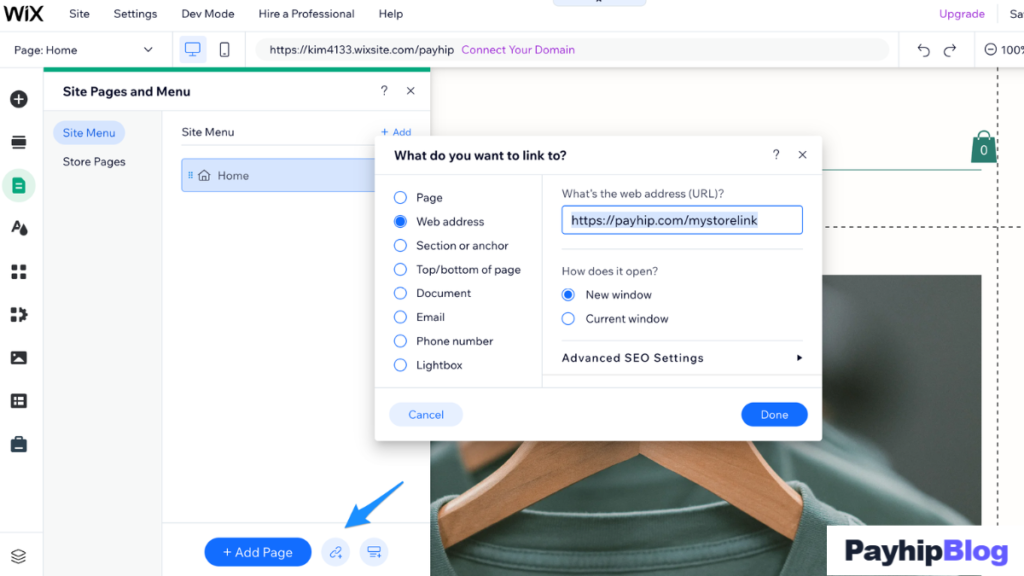
The first thing I recommend is creating and testing the product inside Payhip before connecting it to your website.
Log in to your Payhip account and open your store dashboard.
Create a new product and choose the appropriate product type.
For a digital product, you might upload:
- PDF files
- ZIP files
- Templates
- Design resources
- Audio files
- Video files
- Software files
- Other downloadable content
Give the product a clear name.
For example, instead of naming a product:
Template 01
use something more descriptive:
50 Instagram Post Templates for Small Businesses
Add a useful description explaining what the customer receives.
I also recommend checking the product page yourself before putting it on your website. Look at it from a customer’s point of view. Is the price easy to find? Is the product description understandable? Does the download information make sense how to add Payhip to a website?
This small check can prevent unnecessary problems later.
Step 2: Get the Payhip Product Link
After creating your product, you need its URL.
Open the product in your Payhip dashboard and locate the option for viewing or sharing the product.
Copy the product link.
It will point visitors from your website to your Payhip product page.
For example, your website could have a button like:
Buy the PDF Guide
When someone clicks it, they are sent to the corresponding Payhip product page.
This is one of the simplest ways to add Payhip to almost any website because it does not require complicated coding.
Step 3: Add a Payhip Button to Your Website
If you have access to your website’s HTML, you can create a normal button that links to your Payhip product.
For example:
<a href="YOUR-PAYHIP-PRODUCT-LINK" class="buy-button">
    Buy Now
</a>
You can then style the button with CSS.
.buy-button {
    display: inline-block;
    padding: 12px 22px;
    background: #222;
    color: white;
    text-decoration: none;
    border-radius: 6px;
}

.buy-button:hover {
    opacity: 0.85;
}
Replace YOUR-PAYHIP-PRODUCT-LINK with your actual Payhip product URL.
If your website already has a design system, you can also style the button to match your existing colors.
For example, if your website uses a blue color for its main buttons, there is no reason to create a completely different-looking Payhip button.
Step 4: Add Payhip to a Product Page
A dedicated product page can make the connection feel more natural.
Suppose your website has a page for a photography preset pack.
You could create something like:
<section class="product">
    <img src="preset-pack.jpg" alt="Photography Preset Pack">

    <h1>Photography Preset Pack</h1>

    <p>
        A collection of presets designed for photographers
        and content creators.
    </p>

    <a href="YOUR-PAYHIP-PRODUCT-LINK" class="buy-button">
        Buy Now
    </a>
</section>
The visitor sees your website’s branding, product information, and image first.
The Payhip link then takes them to the purchasing process.
This works particularly well if you already have a blog or business website and want to add a small digital-product section without rebuilding the entire site.
Step 5: Create a Shop Page
If you have several products, linking every product separately from different parts of your website can become messy.
A better option is creating a dedicated Shop page.
For example:
Home
About
Blog
Shop
Contact
Your Shop page can display your products as cards.
A simple HTML example could look like this:
<div class="product-card">
    <img src="ebook.jpg" alt="SEO Ebook">

    <h2>SEO Beginner Guide</h2>

    <p>Learn practical SEO techniques with simple examples.</p>

    <a href="YOUR-PAYHIP-LINK">
        View Product
    </a>
</div>
You can repeat this structure for your other products.
The important part is that each product card points to the correct Payhip product.
Step 6: Add Payhip Links to WordPress
If your website runs on WordPress, you do not necessarily need to edit PHP files.
You can usually add a button or link directly through the WordPress editor.
For example, create a new page called Shop.
Add a heading such as:
Digital Products
Then add your product image, description, and a button.
Set the button URL to your Payhip product page.
A simple layout could be:
Canva Templates
50 ready-to-edit templates for social media content.
View Product
The “View Product” button can lead to Payhip.
If you are using the WordPress block editor, this can be done without writing code.
Step 7: Add Payhip to a Custom HTML Website
For a custom website, adding Payhip can be even more straightforward.
You control the HTML, CSS, and JavaScript, so you can place Payhip links wherever they make sense.
For example, if your homepage already has a product section:
<section class="products">

    <div class="product-card">
        <h3>Digital Marketing Guide</h3>
        <p>PDF guide for beginners.</p>
        <a href="YOUR-PAYHIP-LINK">Buy Now</a>
    </div>

    <div class="product-card">
        <h3>Website Templates</h3>
        <p>Responsive templates for small websites.</p>
        <a href="YOUR-PAYHIP-LINK">Buy Now</a>
    </div>

</section>
You can then use CSS to make the cards match the rest of your website.
This is also useful for developers who have built websites using HTML, CSS, JavaScript, Bootstrap, or Tailwind CSS.
Can You Embed Payhip Directly Into a Website?
Depending on the Payhip feature and the type of website you’re using, Payhip may provide options for embedding store or product elements.
If your Payhip dashboard provides an official embed or button option, use the code generated there rather than copying random code from another website how to add Payhip to a website.
This matters because third-party snippets can become outdated or behave differently from Payhip’s current checkout system.
If you are using an embed, test it on both desktop and mobile.
A checkout element that looks fine on a 27-inch monitor might not fit properly on a small Android phone.
Adding Payhip to a Wix Website
Wix users can connect products by adding buttons or links to Payhip.
Open the Wix editor and navigate to the page where you want the product.
Add a button and change its link to your Payhip product URL.
You can also create a shop-style page using Wix’s existing layout tools.
For example:
Ebook
Learn the basics of website SEO.
$9
[Buy Ebook]
The button sends the customer to Payhip.
The benefit is that you can keep your website’s design while letting Payhip handle the purchasing side.
Adding Payhip to Squarespace
Squarespace works in a similar way.
Create a product section on your page and add a button.
Use the Payhip product URL as the destination.
One practical tip is to keep the product information consistent between your website and Payhip.
If your website says a product contains 30 templates but the Payhip page says 25, customers can become confused.
Whenever you update a product, check both locations.
Adding Payhip to a Blog
You do not need a traditional ecommerce website to use Payhip.
A blog can also send readers to Payhip products.
For example, imagine you publish an article about resume design.
At the end of the article, you could naturally mention a related resume template.
The structure could be:
Free Resume Tips
Your article provides useful information.
Then:
Need a ready-made template?
You can place a button that takes interested readers to your Payhip product.
The important part is relevance. Do not add product links randomly to every paragraph.
The product should make sense in the context of the page.
A Practical Example
Let’s say I have a small website about graphic design.
I create a Payhip product called:
100 Social Media Design Templates
On my website, I create a page called /templates.
The page contains:
- Product image
- Product title
- Short description
- Who the product is for
- What is included
- Price information
- Payhip purchase button
The visitor reads the information and clicks the button.
They are then taken to the Payhip product page to complete the purchase.
After purchase, Payhip handles the digital product delivery according to the product and account setup.
This means I do not need to create my own download system just to sell one template package.
Common Mistakes When Adding Payhip
One mistake I have seen people make is simply placing a Payhip link on their website without explaining what the customer is buying.
A button saying Buy Now is not enough by itself.
Give visitors useful information first.
Another mistake is using an enormous product image that slows down the website.
Resize and compress images before uploading them.
WebP can be useful for website images when your platform supports it.
A third mistake is forgetting mobile users.
Open your website on an Android phone or iPhone and test the complete process.
Check whether:
- The button is easy to tap
- Product images fit the screen
- Text is readable
- The Payhip page opens correctly
- The checkout experience works as expected
Do Not Build a Fake Checkout Page
If Payhip is handling your checkout, you generally do not need to create a fake checkout form on your website.
For example, avoid creating a page that asks customers for payment information and then separately sends them to Payhip unless you have a legitimate technical reason and understand the security requirements how to add Payhip to a website.
A simpler setup is often safer:
Your Website → Payhip → Payment → Product Delivery
Let the appropriate payment and checkout system handle sensitive payment information.
Test the Entire Customer Journey
Before publishing your new shop, test it yourself.
Open your website on your computer.
Click the product button.
Check that the correct Payhip product opens.
Then repeat the test from your phone.
I usually recommend testing at least two screen sizes because responsive problems can be surprisingly easy to miss.
Also check every product link individually.
If you have ten products, do not assume that all ten links work because the first one does.
A single copied URL pointing to the wrong product can create a confusing customer experience.
What If You Change Your Payhip Product URL?
This is something worth remembering when managing an established website.
If you change a product URL or create a new product page, check your website for old links.
You may have the old link in:
- Homepage buttons
- Blog posts
- Navigation menus
- Landing pages
- Email campaigns
- Social media profiles
Update those links where necessary.
If you have many pages, keeping a simple spreadsheet of your Payhip products and their website links can make maintenance easier.
Can You Add Payhip to a Laravel Website?
Yes, if you are building a custom Laravel website, you can treat a Payhip product URL like any other external link.
For example, in a Blade file:
<a href="{{ $product->payhip_url }}" class="btn btn-primary">
    Buy Now
</a>
Your database could contain a field such as:
payhip_url
Then each product can have its own Payhip destination.
This can be useful if you are building your own product catalog but do not want to implement the complete payment and digital-delivery process yourself how to add Payhip to a website.
The exact implementation depends on your Laravel application and how you want to manage products.
How I Would Set Up a Small Payhip Website
For a small digital-product website, I would keep the setup simple.
The homepage would explain what the website offers.
The Shop page would show the available products.
Each product would have its own information page.
The purchase button would take the visitor to the appropriate Payhip page.
The basic structure would be:
Website
│
├── Home
├── About
├── Blog
├── Shop
│   ├── Product 1
│   ├── Product 2
│   └── Product 3
└── Contact
        │
        ▼
      Payhip
        │
        ▼
     Checkout
        │
        ▼
   Digital Delivery
This approach keeps responsibilities clear. Your website handles presentation and content, while Payhip handles the selling side of your digital products how to add Payhip to a website.
When Should You Use a Payhip Link Instead of an Embed?
For a beginner, I would start with a normal product link or button.
It is easy to understand, easy to test, and works with almost any website platform.
An embedded option can make sense when you want a more integrated shopping experience and Payhip officially supports the required functionality for your setup how to add Payhip to a website.
There is no need to make the implementation complicated just because you have access to HTML, JavaScript, or other development tools how to add Payhip to a website.
Simple systems are often easier to maintain.
Final Thoughts
Adding Payhip to a website does not have to mean rebuilding your entire website as an ecommerce store. For many small creators, a well-designed product page with a clear Payhip button is enough to connect their audience with their products how to add Payhip to a website.
The easiest starting point is to create your product in Payhip, copy its product URL, and place that URL behind a clear button on your website. If you have multiple products, create a dedicated Shop page and make sure every product has the correct link how to add Payhip to a website.
Before sending visitors to the store, test the whole process on both desktop and mobile. Check your product descriptions, images, links, and checkout flow. A few minutes of testing can save you from discovering later that an important button sends customers to the wrong page how to add Payhip to a website.
If your website grows, you can consider a more integrated setup. But when you are starting with a few digital products, keeping the connection between your website and Payhip simple can make the whole selling process much easier to manage how to add Payhip to a website.
Next Read: how to change Payhip store URL