how to connect PayPal to Payhip If you are selling ebooks, PDFs, templates, online courses, printables, or other digital products through Payhip, connecting a payment method is one of the first things you need to do. Payhip handles the storefront and product delivery, while a payment processor handles the actual transaction how to connect PayPal to Payhip.
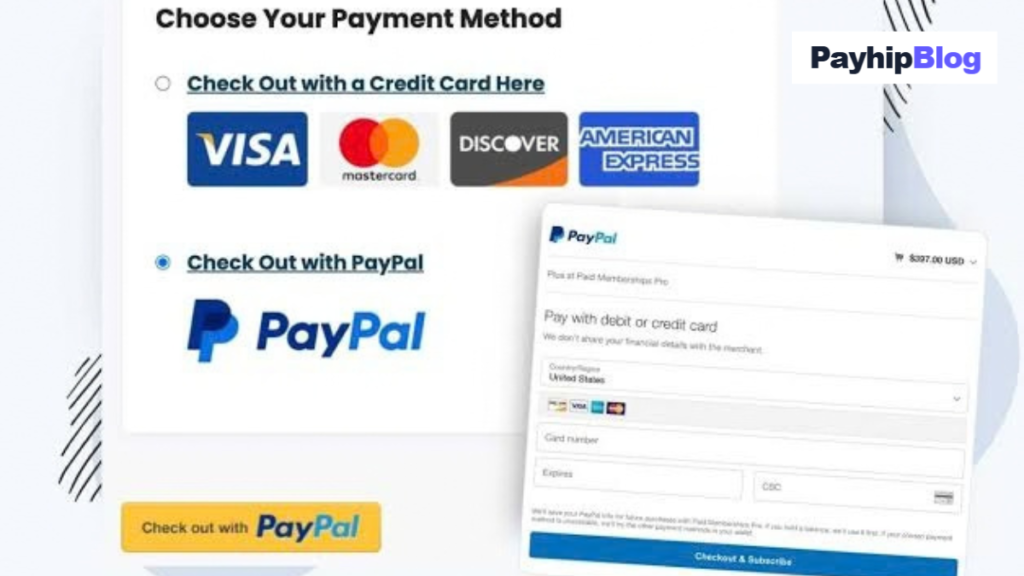
PayPal is one of the payment options supported by Payhip. Once it is connected correctly, customers can see PayPal as a payment option during checkout and are redirected to PayPal to complete their purchase. Payhip currently supports PayPal across more than 200 markets, although the exact payment features and account requirements depend on the seller’s country PayPal is one of the payment options supported by Payhip. Once it is connected correctly, customers can see PayPal as a payment option during checkout and are redirected to PayPal to complete their purchase. Payhip currently supports PayPal across more than 200 markets, although the exact payment features and account requirements depend on the seller’s country .
.
I find that the connection itself is usually straightforward. Most problems happen before the connection starts: the PayPal account is not verified, the wrong account is being used, a required payment method has not been added, or PayPal requires a business account in that particular country.
This guide walks through the complete process, including what to check before connecting PayPal, how to connect it from a computer, what customers see, common errors, and what to do when the connection does not work how to connect PayPal to Payhip.
What You Need Before Connecting PayPal to Payhip
Before opening your Payhip dashboard, it is worth checking your PayPal account first. Doing this can save you from going through the connection process several times.
You generally need an active PayPal account that meets PayPal’s requirements for receiving payments in your country. Depending on your location, Payhip may allow a personal PayPal account, while sellers in other countries may need a business account. Payhip specifically notes that account requirements vary by country how to connect PayPal to Payhip.
You should also make sure your PayPal email address is correct and that your account has completed any required verification.
Another useful check is whether you have a payment method connected to PayPal. Payhip’s troubleshooting guide says that an account without a linked payment method, such as an eligible bank account or card, can sometimes have problems connecting to external platforms how to connect PayPal to Payhip.
Before starting, I would check these things:
- Your PayPal account is active.
- Your PayPal email address is correct.
- Your PayPal account is verified where required.
- Your country supports the PayPal services you need.
- Your PayPal account has the required payment method.
- You can log in to PayPal successfully.
- You have access to the email address associated with PayPal.
If you are using a laptop or desktop computer, keep both your Payhip and PayPal login details available how to connect PayPal to Payhip.
Step 1: Log In to Your Payhip Account
Start by opening Payhip and signing into your seller account.
Once you reach your dashboard, look at the top-right area of the screen. Payhip’s current instructions direct sellers to open their account settings and then access the payment settings how to connect PayPal to Payhip.
Go to:
Account → Settings → Payment Details
The exact appearance of the dashboard can change as Payhip updates its interface, but the Payment Details section is where you manage your payment processors.
You may see several payment gateways depending on your country how to connect PayPal to Payhip.
If PayPal is available for your account, you should see it among the available payment options.
Step 2: Find PayPal Under Payment Details
Inside Payment Details, look for PayPal.
You should see an option such as Connect or a PayPal connection button.
Click it to begin the process.
Payhip will ask for your PayPal email address. Enter the email address associated with the PayPal account you want to use for receiving payments.
Take a moment to check the spelling.
This is a surprisingly common mistake. For example, if your PayPal account uses example@gmail.com but you accidentally enter another email address, the verification process can become confusing how to connect PayPal to Payhip.
After entering the email address, continue to the next step.
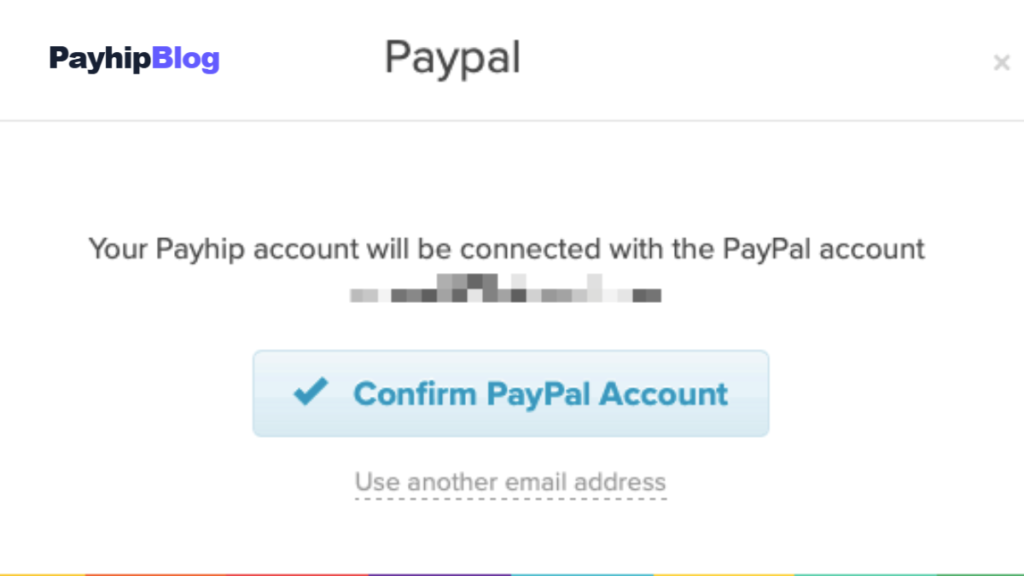
Step 3: Confirm Your PayPal Account
Payhip will then guide you through the PayPal authorization process.
According to Payhip’s current instructions, you will be asked to verify your PayPal email address and then continue to PayPal. You may be asked to confirm your email and location before logging in how to connect PayPal to Payhip.
If you are already logged into PayPal, the process may be relatively quick.
If you are not logged in, PayPal will ask you to sign in.
Use the normal PayPal login page and avoid entering your password into an unfamiliar website or popup. The safest approach is to make sure you are actually being redirected to PayPal during the authorization process how to connect PayPal to Payhip.
Step 4: Authorize the Payhip Connection
After logging into PayPal, you should see a screen asking you to approve the connection between your PayPal account and Payhip.
Review the information and choose the option to agree and connect how to connect PayPal to Payhip.
PayPal then authorizes the integration.
Afterward, you are redirected back to Payhip. Payhip’s documented process finishes with selecting Go Back to Payhip, after which the PayPal integration should be connected how to connect PayPal to Payhip.
At this point, return to:
Account → Settings → Payment Details
Check the PayPal section again.
The status should indicate that PayPal is connected.
Step 5: Check Whether PayPal Needs Activation
Sometimes connecting PayPal is not the final step.
Payhip explains that some sellers need to confirm their PayPal email address before they can actually accept payments.
If there is a warning in your Payhip Payment Details section saying that you cannot accept PayPal payments until an issue is resolved, do not ignore it how to connect PayPal to Payhip.
Check the email account associated with PayPal.
Look for an email from PayPal asking you to confirm your email address. Also check your spam or junk folder.
If you cannot find the message, Payhip recommends logging into PayPal and following its process for requesting another confirmation email how to connect PayPal to Payhip.
This is one of those small setup details that can make a big difference. Your PayPal account may appear connected while a verification requirement still prevents you from accepting payments how to connect PayPal to Payhip.
What Happens When a Customer Buys Your Product?
Once PayPal is properly connected, the customer can see PayPal as a payment option during checkout.
For example, imagine you are selling a $10 PDF guide through Payhip.
A customer visits your product page, clicks the purchase button, and reaches checkout. If PayPal is enabled, the customer can choose PayPal and continue through PayPal’s payment process how to connect PayPal to Payhip.
After the payment is completed, the transaction is handled by the connected payment processor. Payhip states that payments are processed and sent directly to the connected payment processor at the time of purchase how to connect PayPal to Payhip.
This is important because you should not expect the money to sit inside a Payhip wallet.
Your PayPal account is where you should look when checking for PayPal payments how to connect PayPal to Payhip.
How to Check if Your PayPal Connection Works
Before advertising your Payhip store everywhere, I recommend doing a complete test of the checkout process.
You can check the product page from another browser or an incognito/private window how to connect PayPal to Payhip.
For example, if you normally use Chrome, open a private Chrome window or use another browser such as Microsoft Edge.
Check your product page and go through the checkout process far enough to confirm that PayPal appears as an available payment method.
Do not create fake transactions just to test the system if you can avoid it. Instead, first verify that:
- The product is published.
- The product has a valid price.
- PayPal is shown as a payment option.
- The checkout redirects correctly.
- Your PayPal account is the account you expect to receive the payment.
This simple test can catch configuration problems before a real customer encounters them how to connect PayPal to Payhip.
Common Problem: PayPal Is Not Showing in Payhip
One of the first things to check is your country.
Payhip does not show exactly the same payment gateway options to every seller. Its payment gateway page explains that available options depend on the seller’s location and supported providers.
Go to your Payhip Payment Details section and check which payment gateways are available for your account.
If PayPal is not listed, do not assume that repeatedly refreshing the page will fix it how to connect PayPal to Payhip.
Instead, check whether PayPal currently supports the necessary receiving services in your country.
PayPal’s country-specific services can vary significantly. Its official documentation shows that different countries can have different capabilities for sending, receiving, and withdrawing funds.
This is especially important if you are starting an online store from a country where PayPal does not officially offer the receiving features you need.
Do not try to bypass country restrictions by entering false residence information. Your payment account should accurately represent your real details and comply with PayPal’s terms.
Common Problem: Your PayPal Account Is Not Verified
An unverified PayPal account can prevent the connection from working correctly.
Payhip specifically lists account verification as one of the common reasons a PayPal connection fails how to connect PayPal to Payhip.
Log into PayPal directly and check whether it is asking you to confirm your email address or complete another verification step.
Complete any legitimate verification request before trying the Payhip connection again.
After doing that, return to Payhip and try connecting PayPal again how to connect PayPal to Payhip.
Common Problem: PayPal Requires a Business Account
This is another situation that can confuse new sellers.
Not every country has exactly the same PayPal account requirements.
Payhip explains that personal PayPal accounts can be used in certain countries, while sellers in other supported countries may need a business PayPal account.
Therefore, if you receive a message saying that your PayPal account type cannot be connected, do not immediately assume that Payhip is broken.
Check the account requirements for your country.
If PayPal officially requires a business account for your location and your activity, follow PayPal’s normal account-upgrade or business-account process.
Common Problem: You Are Trying to Connect PayPal on a Phone
If you are setting up your Payhip store on an Android phone or iPhone and the PayPal authorization keeps failing, try a desktop or laptop.
Payhip’s troubleshooting documentation specifically mentions mobile-device connection problems as one possible cause of integration failures.
For example, if the connection keeps returning you to the same Payhip page on Chrome for Android, try the same process on a Windows laptop using Chrome or Microsoft Edge.
This does not mean PayPal can never be connected from a phone. It simply means that switching to a desktop browser can help when the authentication or redirect process behaves unexpectedly how to connect PayPal to Payhip.
Common Problem: PayPal Was Connected Before
Another situation occurs when you have already connected the same PayPal account to another Payhip account.
Payhip says that the same PayPal account can be connected to multiple Payhip accounts, but previous connection problems can sometimes interfere with reconnecting the account how to connect PayPal to Payhip.
If your connection appears stuck, go back to:
Account Settings → Payment Details → PayPal
Depending on the current interface, you may have an option to manage, disconnect, and reconnect PayPal.
Payhip recommends disconnecting and reconnecting as a troubleshooting step when appropriate how to connect PayPal to Payhip.
What About PayPal Fees?
Connecting PayPal does not mean every transaction will have exactly the same fee.
PayPal’s fees depend on factors such as the country, transaction type, and currency how to connect PayPal to Payhip.
Payhip currently notes that its listed standard credit and debit card PayPal fee is 2.99% plus a fixed fee that varies by transaction currency, with an additional international commercial transaction fee in applicable cases. These fees are collected by PayPal rather than Payhip.
Because pricing can change, check PayPal’s current pricing information for your own country before calculating your profit margin.
For example, if you sell a $20 digital product, do not simply assume that you will receive exactly $20 in your PayPal balance how to connect PayPal to Payhip.
Your actual amount can be affected by payment-processing fees and, in some situations, currency conversion.
How PayPal Payouts Work With Payhip
After a customer pays, the money goes to your connected payment processor how to connect PayPal to Payhip.
Payhip explains that PayPal withdrawals normally need to be initiated manually unless automatic transfers are enabled for eligible PayPal accounts. Automatic transfer options depend on the PayPal account type and availability.
There can also be a delay with your first PayPal transaction.
Payhip states that the first transaction through PayPal on Payhip can go through an automatic approval process, which may delay the payout. After approval, subsequent payments can be sent instantly to the PayPal account.
So if your first sale does not appear exactly when you expect it, check the PayPal transaction status before assuming something went wrong.
A Practical Example
Suppose you have created a small digital shop selling Canva templates.
You upload a social-media-template bundle to Payhip and price it at $8.
Your setup could look like this:
Product: Social Media Template Bundle
Price: $8
Store: Payhip
Payment processor: PayPal
Customer device: Phone or laptop
Seller device: Windows laptop
After connecting PayPal, you publish the product.
A customer opens the product page from their phone, clicks purchase, and reaches checkout. PayPal appears as a payment option. The customer follows the PayPal checkout process, and the payment is processed through the connected PayPal account.
The important part is that you do not need to manually email the digital file after every successful purchase if your Payhip product and delivery settings are configured correctly.
That automation is one of the useful reasons creators use platforms such as Payhip for digital products.
Mistakes I Would Avoid
The biggest mistake is rushing into promotion before testing checkout.
It is easy to spend several days creating Instagram posts, Pinterest pins, TikTok videos, or blog content and then discover that customers cannot complete payment.
I would also avoid these mistakes:
Using incorrect PayPal information:
Double-check the PayPal email before starting the connection.
Ignoring verification messages:
A PayPal account may need email or account verification before accepting payments.
Using false country information:
Your PayPal account should use accurate information. Do not attempt to bypass regional restrictions with fake addresses or accounts.
Testing only from your own logged-in browser:
Your own browser can contain saved sessions and cookies that hide checkout problems. Test the storefront from a private window as well.
Assuming PayPal fees are fixed everywhere:
Fees and currency-conversion costs can vary.
Panicking over the first payout:
The first PayPal transaction may be subject to an approval process, according to Payhip.
Can You Connect PayPal and Another Payment Processor?
Payhip supports multiple payment processors, and its documentation says that in most cases sellers can connect PayPal plus one other payment processor for cards and other applicable payment types.
This can be useful because not every customer wants to use PayPal.
For example, one buyer may already have a PayPal account, while another may prefer paying directly with a card through another supported processor.
The payment gateways available to you depend on your country and Payhip’s current support for that region.
What If PayPal Still Will Not Connect?
If you have verified your account, checked your country, confirmed your payment method, tried a desktop browser, and still cannot connect PayPal, go through the setup again carefully.
A simple troubleshooting order is:
- Log into PayPal directly.
- Check for account warnings.
- Confirm your email address.
- Confirm your account type.
- Check whether your country supports receiving payments.
- Make sure an eligible payment method is connected.
- Open Payhip on a desktop or laptop.
- Go to Account → Settings → Payment Details.
- Disconnect and reconnect PayPal if appropriate.
- Contact Payhip or PayPal support if the issue remains.
Payhip’s troubleshooting guide covers these connection problems and recommends contacting its support team when a previous connection issue cannot be resolved.
Final Thoughts
Connecting PayPal to Payhip is normally a short setup process, but the details around account verification, country availability, account type, and payment methods matter more than the actual clicking.
The basic path is simple: open your Payhip dashboard, go to Account → Settings → Payment Details, choose PayPal, enter your PayPal email, follow the PayPal authorization steps, and return to Payhip.
The part I would pay the most attention to is what happens before and after the connection. Make sure your PayPal account can receive payments in your country, complete required verification, and test your checkout before sending customers to your store.
If everything is configured properly, Payhip can handle the storefront and digital-product delivery while PayPal handles the payment side. That gives you a relatively simple setup for selling ebooks, PDFs, templates, courses, and other digital products without building your own payment system from scratch.
Payment services change their country support, fees, and account requirements from time to time, so it is worth checking the official Payhip and PayPal documentation whenever you are setting up a new store rather than relying on an old tutorial.
Next Read: how to sell templates on Payhip