If you sell ebooks, PDFs, templates, courses, software, or other digital products through Payhip, connecting a payment processor is one of the first things you need to sort out. Without a supported payment processor connected, customers may be able to browse your store, but they cannot complete purchases.
I recently looked at the Stripe connection process from the seller’s side, and the good news is that Payhip keeps the setup fairly simple. You don’t normally need to copy API keys, create webhooks manually, or write code. Payhip sends you to Stripe, where you authorize the connection, and then brings you back to your store.
There are, however, a few details that can cause confusion—especially if your Stripe account isn’t fully activated, you’re using multiple Stripe accounts, or Stripe isn’t available for your business location.
This guide explains how to connect Stripe to Payhip, what customers see at checkout, how payouts work, common mistakes, and what to check if the connection doesn’t work.
What Is Stripe and Why Connect It to Payhip?
Stripe is a payment processing platform that allows businesses to accept card and other supported payment methods online.
Payhip is an ecommerce platform commonly used to sell digital products, physical products, memberships, courses, and other offerings.
When you connect Stripe to Payhip, Payhip uses your connected Stripe account to process eligible customer payments. Payhip’s current documentation says sellers can connect PayPal plus another payment processor in most cases, depending on the available payment methods and region.
For example, imagine that you sell a $15 PDF guide through Payhip. A customer opens your product page, clicks the purchase button, and reaches checkout. If Stripe is connected, the customer can use the payment options supported by Stripe for that transaction rather than you having to manually collect payment and send the file yourself.
That makes the entire process much more practical for a small digital-product business.
Before Connecting Stripe to Payhip
Before opening the Payhip settings page, I recommend checking your Stripe account first.
You should have:
- A Payhip account
- A Stripe account, if you’re not creating one during the connection process
- A supported business location
- Your Stripe account information ready
- Access to the email address and authentication method associated with Stripe
- A product ready to test after the connection
The most important point is country availability.
Stripe is not available for businesses in every country. Stripe’s current global availability page lists supported countries and regions, and Pakistan is not currently listed among Stripe’s supported payment-processing countries.
This matters if you’re physically operating a business in Pakistan. You shouldn’t simply select another country because Stripe happens to support it. Stripe states that opening an account for another country requires appropriate business, tax, location, phone, identification, website, and bank-account requirements for that country.
So, if Stripe isn’t available for your actual business location, look at the payment processors Payhip makes available to you instead of trying to bypass Stripe’s country requirements.
How to Connect Stripe to Payhip
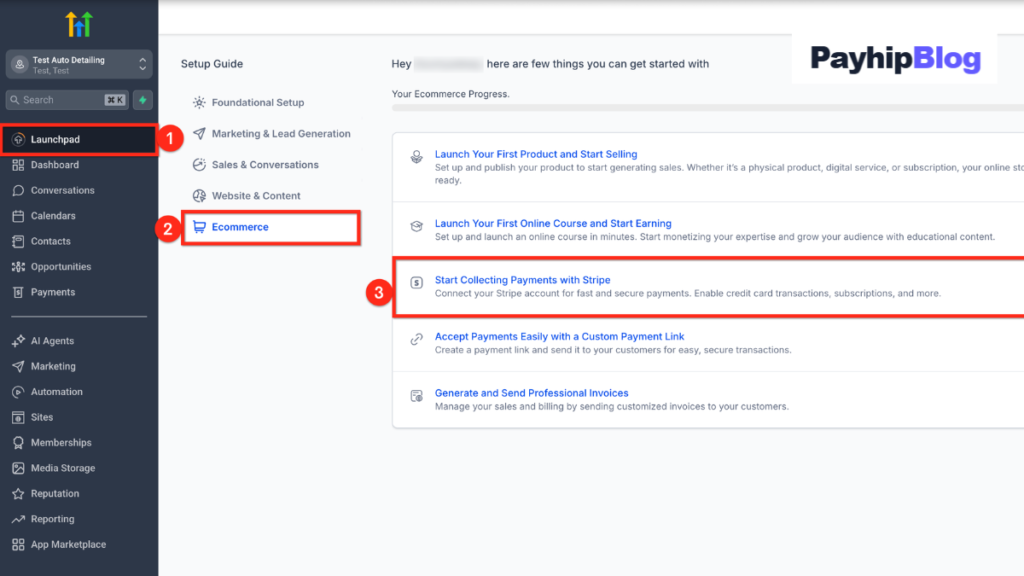
The basic connection process is straightforward.
Step 1: Log in to Payhip
Open Payhip on your computer and sign in to your seller account.
You can do this from a Windows PC, MacBook, Chromebook, or another device with a modern web browser. I normally recommend doing payment setup from a laptop or desktop because it’s easier to keep the Payhip and Stripe screens organized.
Once you’re inside your dashboard, open your account settings.
Step 2: Open Payment Details
From your Payhip dashboard, go to:
Account → Settings → Payment Details
Payhip displays the payment processors that are available for your account and region. Stripe will appear there if it is available to you.
This is an important detail: don’t assume every Payhip user sees exactly the same payment options.
The available processors can depend on your location and other account conditions.
Step 3: Find Stripe
Look through the payment options for Stripe.
You’ll normally see an option to connect your Stripe account.
Click Connect.
Payhip will redirect you to Stripe rather than asking you to manually enter complicated integration credentials.
This is one reason I prefer the normal Payhip connection method over trying to build a custom Stripe integration.
Step 4: Select Your Stripe Account
After being redirected to Stripe, you’ll be asked to choose or connect the Stripe account you want to use.
If you already have an activated Stripe account, follow the prompts to authorize Payhip.
If you have multiple Stripe accounts, slow down here.
This is an easy place to make a mistake.
For example, suppose you have one Stripe account for an old project and another for your current business. If you authorize the wrong one, you might later look at your current Stripe dashboard and wonder why a Payhip payment isn’t appearing there.
Payhip also notes that it doesn’t display your complete connected processor account information for security reasons. If you have multiple accounts, make sure you’re checking the correct Stripe account when looking for payments.
Step 5: Complete Stripe Verification
If Stripe needs additional information before activating the account, you’ll need to complete the requested steps.
This can include account details and two-step authentication.
Don’t rush this part.
The information you provide to Stripe should accurately represent your business and location. Trying to use someone else’s information or pretending your business operates in another country can create verification and payout problems later.
If your Stripe account isn’t activated, connecting it to Payhip doesn’t magically remove Stripe’s verification requirements.
Step 6: Authorize the Connection
Once Stripe has accepted the account setup, you’ll see an authorization step.
Approve the connection so Payhip can use the Stripe account as your payment processor.
Payhip’s official instructions describe this as selecting the Stripe account and choosing Authorize access to this account.
After authorization, you should be redirected back to Payhip.
Step 7: Confirm the Connection in Payhip
Return to:
Account → Settings → Payment Details
Check that Stripe now shows as connected.
This is the part I would always verify instead of assuming the connection worked simply because the Stripe page closed.
If Payhip shows the account as successfully connected, the integration is ready for eligible purchases.
What If You Don’t Have a Stripe Account?
You don’t necessarily need to create Stripe separately before starting.
When you click the Stripe connection option in Payhip, Payhip provides an option to sign up for Stripe if you don’t already have an account.
You can follow that process and complete Stripe’s onboarding requirements how to connect Stripe to Payhip.
However, don’t confuse creating an account with being ready to receive payouts.
Stripe may need to verify your business and other information before payments can be fully processed and paid out.
What Customers See After You Connect Stripe
One thing I like about this setup is that your customers don’t need their own Stripe accounts how to connect Stripe to Payhip.
At checkout, they can enter their eligible debit or credit card information through the payment flow.
Depending on the Stripe setup and available payment methods, customers may also see additional options such as Apple Pay, Google Pay, Link, and other payment methods. Availability varies by location and configuration how to connect Stripe to Payhip.
For example, imagine you sell a $9.99 Canva template pack.
A visitor finds your Payhip product page, clicks Buy, and reaches checkout. Instead of emailing you for payment instructions, they can complete the transaction through the payment options presented at checkout.
After a successful purchase, Payhip can handle the product-delivery side of the transaction while Stripe processes the payment.
That’s especially useful for digital products because the whole process can happen without you being online how to connect Stripe to Payhip.
How Stripe Payouts Work With Payhip
One mistake beginners sometimes make is expecting the money to appear in their normal bank account immediately after a sale.
The payment first goes through your connected payment processor how to connect Stripe to Payhip.
Payhip says Stripe payouts are sent to the connected bank account according to your Stripe payout schedule. Stripe’s default payout schedule can be daily, but the payout frequency can be changed to weekly, monthly, or manually initiated.
There can also be a delay with your first Stripe transaction through Payhip because Stripe may keep the payment pending while its approval process is completed. Payhip says the length of that period depends on location.
So if you make your first sale and don’t immediately see the money in your bank account, don’t assume the integration has failed.
Check the Stripe dashboard first how to connect Stripe to Payhip.
How Much Does Stripe Charge?
Payment processing isn’t normally free.
Payhip’s Stripe help page currently gives a standard example of 2.9% + $0.30 per transaction, while also noting that fees can vary by country. Stripe’s own pricing should be checked for the applicable rate for your account how to connect Stripe to Payhip.
For example, if you sell a $20 product, a percentage-based fee plus a fixed fee is deducted according to the applicable Stripe pricing.
This is why I recommend calculating your actual profit before choosing your product price.
If you’re selling a $2 digital product, a fixed transaction fee can have a much bigger effect on your margin than it would on a $30 product.
Don’t simply copy someone else’s pricing strategy without considering your own transaction costs how to connect Stripe to Payhip.
A Simple Test I Would Run Before Promoting a Store
After connecting Stripe, don’t immediately send hundreds of visitors to your Payhip store.
Test the buying process first.
I would check these things:
- Open the Payhip product page.
- Check the displayed price.
- Go through checkout.
- Confirm the Stripe payment option appears.
- Complete a legitimate test purchase using an appropriate payment method how to connect Stripe to Payhip.
- Check the order inside Payhip.
- Check the corresponding transaction in Stripe.
- Confirm the product delivery works.
- Check the customer email.
- Check the payout status inside Stripe.
This catches problems before a real customer discovers them.
For a digital ebook store, for example, you want to make sure the buyer receives the ebook after paying—not an old version of the file, an incorrectly configured product, or no download at all how to connect Stripe to Payhip.
Common Stripe-to-Payhip Problems
Stripe Isn’t Showing in Payhip
The first thing I’d check is your country and the payment processors currently available to your Payhip account.
Payhip says sellers can see the payment gateways available in their region under Payment Details.
If Stripe isn’t available, don’t try to force the integration how to connect Stripe to Payhip.
Look at Payhip’s other supported processors instead.
Stripe Connects, But You Can’t Find a Payment
Check which Stripe account is connected.
This becomes especially important if you’ve created multiple Stripe accounts.
Payhip recommends checking the order details and the payment processor badge to identify which processor handled the transaction how to connect Stripe to Payhip.
Then sign in to the corresponding Stripe account and search the relevant date range.
Your First Payment Is Pending
This doesn’t necessarily mean something is broken how to connect Stripe to Payhip.
Payhip specifically notes that the first Stripe transaction may remain pending for several days during Stripe’s approval process.
Give the payment time to move through the required processing and verification steps, and check the status inside Stripe.
Your Customer Can’t Pay
Don’t immediately assume Stripe is disconnected.
The problem could involve the customer’s card, a payment method unavailable in their location, authentication requirements, currency configuration, or another checkout issue.
Try your own test checkout and look at what Payhip and Stripe report how to connect Stripe to Payhip.
You Entered Incorrect Business Information
This is one mistake I’d avoid completely how to connect Stripe to Payhip.
Payment processors deal with real money and financial verification. Your business information should be accurate and consistent.
If you’re setting up Stripe in a supported country, make sure you actually satisfy Stripe’s requirements for operating there. Stripe specifically lists legal entity, tax ID, physical location, phone, identification, website, and bank-account requirements for accounts opened in another country how to connect Stripe to Payhip.
Do You Need Coding Skills?
No, not for the standard Payhip-to-Stripe connection.
You don’t need to create a Laravel project, install an SDK, write PHP code, create an API controller, or manually configure Stripe webhooks for the normal Payhip connection how to connect Stripe to Payhip.
That’s an important distinction.
If you’re building your own ecommerce website from scratch, Stripe integration can involve programming. But when you’re using Payhip’s built-in payment connection, Payhip handles the integration layer for you how to connect Stripe to Payhip.
For someone who simply wants to sell an ebook or downloadable template, this can save a lot of unnecessary technical work how to connect Stripe to Payhip.
Stripe vs. PayPal on Payhip
You don’t necessarily have to think of Stripe and PayPal as mutually exclusive.
Payhip states that in most cases sellers can connect PayPal plus one other payment processor for applicable card and other payment types.
That can be useful if both options are available to your business how to connect Stripe to Payhip.
For example, one customer might prefer paying with a card through Stripe while another may already prefer PayPal.
The exact combination of payment processors available to you depends on your location and Payhip’s current supported options how to connect Stripe to Payhip.
A Note for Sellers Outside Stripe-Supported Countries
This deserves special attention because people often search for Stripe tutorials without checking whether Stripe actually supports their country how to connect Stripe to Payhip.
As of the current Stripe global availability information, Pakistan is not listed as a Stripe payments-supported country.
If you’re running a business from Pakistan, don’t create a fake foreign Stripe account just because a tutorial says it’s possible.
Instead, open your Payhip Payment Details section and check the processors that Payhip makes available for your account.
Payhip currently lists a number of payment processors besides Stripe, including PayPal, Paystack, PayTabs, PayU, Razorpay, and others, although availability varies by country how to connect Stripe to Payhip.
The right choice depends on where your business is legally located and which processor supports your payment and payout requirements.
My Practical Checklist Before Going Live
If I were setting up a new Payhip store, I’d keep this checklist beside me:
- Payhip account created
- Payment processor supported in my country
- Stripe account activated, if applicable
- Business information accurate
- Bank account connected where required
- Stripe successfully authorized
- Payhip shows Stripe as connected
- Product price checked
- Product file tested
- Checkout tested
- Order appears in Payhip
- Payment appears in Stripe
- Customer receives the correct product
- Payout schedule understood
- Transaction fees included in pricing
That last point is easy to forget how to connect Stripe to Payhip.
A store can technically work perfectly while still being poorly priced because the seller never calculated processing costs.
Final Thoughts
Connecting Stripe to Payhip is technically one of the easier parts of setting up a digital-product store. The normal process is mostly a matter of opening Payhip’s Payment Details settings, connecting your Stripe account, completing Stripe’s verification requirements, authorizing the connection, and then checking that Payhip shows Stripe as connected.
The bigger issue is making sure Stripe is actually available for your business location and that your Stripe account is properly verified. If you’re in a country where Stripe isn’t supported, the solution isn’t to manipulate your location or account information. Check Payhip’s available payment processors and choose an option that legitimately supports your business how to connect Stripe to Payhip.
Once everything is connected, take a few minutes to test the complete customer journey. A five-minute checkout test can reveal problems with payment processing, product delivery, emails, or account configuration before a real buyer encounters them.
For me, that’s the most useful part of setting up any online store: don’t just check that the dashboard says “connected.” Actually walk through the purchase process and make sure the money, order, and product all reach the right places how to connect Stripe to Payhip.
Next Read:how to connect PayPal to Payhip